
Creating a website using WordPress is relatively simple, and it’s a popular platform for beginners and experienced web developers alike. Here’s a detailed step-by-step guide to help you build your WordPress website.
Step 1: Get a Domain Name and Hosting
To create a WordPress website, you need two things:
- Domain Name: This is your website’s address on the internet, such as
www.yourwebsite.com. - Web Hosting: This is where your website’s files will be stored. Hosting companies like Bluehost, SiteGround, and HostGator offer affordable plans that include both hosting and a free domain name.
Choose a Hosting Provider: Some popular WordPress hosting options are:
- Bluehost: Known for its beginner-friendly WordPress hosting plans.
- SiteGround: Great customer support and performance.
- HostGator: Offers affordable hosting options.
Many hosting services offer one-click WordPress installation which makes the setup process much easier.
Step 2: Install WordPress
Once you’ve chosen a hosting provider and signed up for a plan, most hosting companies offer a simple method to install WordPress.
One-Click WordPress Installation (Common in most Hosting Services):
- Login to your hosting account.
- Go to your hosting control panel (cPanel).
- Find the WordPress Installer: Look for an option called “WordPress” or “Install WordPress” under software or website builders.
- Click the Install button: Choose the domain where you want to install WordPress and click the install button. The hosting service will automatically install WordPress on your website.
Alternatively, you can install WordPress manually (this is for more advanced users) by downloading WordPress from WordPress.org and uploading it via FTP to your web host.
Step 3: Log In to Your WordPress Dashboard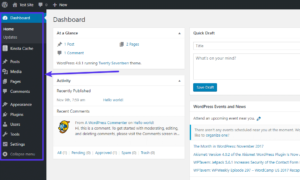
Once WordPress is installed, you can log in to your website’s dashboard:
- Go to:
www.yourwebsite.com/wp-admin - Enter the username and password that you set during installation.
This is where you’ll manage all your website’s content, design, and settings.
Step 4: Choose and Install a WordPress Theme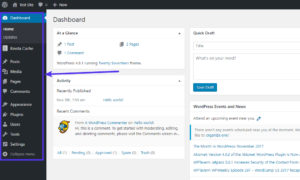
A WordPress theme determines how your website looks. WordPress offers both free and premium themes.
To Install a Free Theme:
- From the WordPress dashboard, go to
Appearance > Themes > Add New. - Browse or search for a theme.
- Click “Install” and then “Activate” to apply the theme to your website.
To Install a Premium Theme:
- Purchase a theme from websites like ThemeForest or Elegant Themes.
- Download the theme’s
.zipfile. - Go to
Appearance > Themes > Add New > Upload Theme. - Click “Choose File,” select the
.zipfile, and then click “Install Now” and “Activate.”
Step 5: Customize Your Website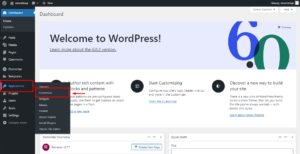
Now that your theme is installed, you can start customizing your website to suit your needs.
Go to
Appearance > Customize. This is where you can change the following:- Site Identity: Set your site title, tagline, and logo.
- Colors: Modify your website’s color scheme.
- Typography: Choose font styles and sizes.
- Homepage Settings: Decide whether your homepage displays recent posts or a static page.
Menus: Go to
Appearance > Menusto create navigation menus for your website (e.g., Main Menu, Footer Menu).Widgets: Widgets are elements like recent posts, calendars, or social media links that can be added to your site’s sidebars or footer areas. Configure them under
Appearance > Widgets.
Step 6: Create Essential Pages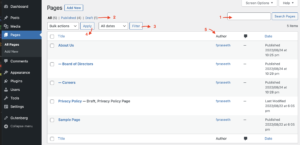
Now that you have a theme and a structure, start adding important pages to your website:
Go to
Pages > Add Newto create new pages like:- Home: Your main landing page.
- About Us: Information about your business or yourself.
- Contact: A form for visitors to reach you.
Edit and publish the pages as needed.
Step 7: Add Content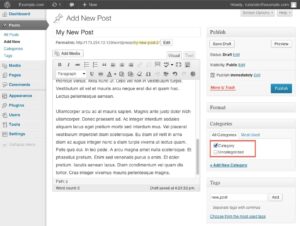
Now you can begin adding content to your site:
- Blog Posts: If your site includes a blog, go to
Posts > Add Newto create posts. - Media: Upload images, videos, or other media via
Media > Add New.
Step 8: Install Plugins for Extra Features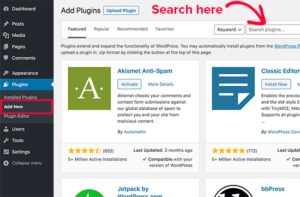
Plugins are tools that enhance the functionality of your WordPress site. Some popular plugins include:
- Yoast SEO: Helps optimize your site for search engines.
- Contact Form 7: Adds contact forms to your site.
- WooCommerce: Converts your site into an online store.
- Jetpack: Adds extra features like site stats, security, and backups.
- Wordfence Security: Protects your website from security threats.
To install a plugin:
- Go to
Plugins > Add New. - Search for the plugin you want.
- Click “Install Now” and then “Activate.”
Step 9: Set Up SEO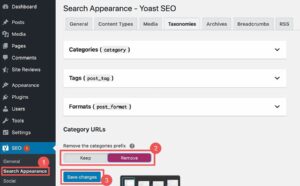
SEO (Search Engine Optimization) helps improve your website’s ranking in search engines like Google. To set up SEO for your site:
- Install an SEO Plugin: Install a plugin like Yoast SEO or RankMath.
- Optimize Pages and Posts: Use the SEO plugin to optimize titles, meta descriptions, and keywords for each page and post.
- Connect to Google Search Console: This helps you monitor your site’s performance on Google search.
Step 10: Launch Your Website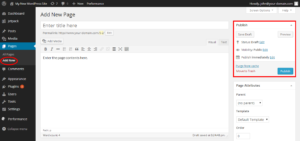
Before launching, make sure to:
- Review all the pages for content and design.
- Test forms, links, and media.
- Make sure your website is mobile-friendly.
- Set up Google Analytics to track site visitors.
Once you’re ready, remove any “Coming Soon” page and let the world visit your site!
Ongoing Steps After Launch
- Backup Your Site: Install a backup plugin like UpdraftPlus to back up your website.
- Update Regularly: Keep WordPress, themes, and plugins updated for security.
- Monitor Performance: Use tools like Google Analytics and Google PageSpeed Insights to monitor site traffic and performance.
Conclusion
Building a WordPress website involves choosing a hosting provider, installing WordPress, selecting a theme, and adding content. With a little customization and by installing plugins, you can turn your website into a functional and professional site for any purpose, whether it’s a blog, portfolio, or eCommerce store.

Designing seamless digital journeys that engage, inspire, and transform your brand’s online presence into a memorable experience
Quicks Links
Home
About Us
Services
Contact
Services
Digital Marketing
SEO
Web Development
